

Growing new plants from root cuttings feels like a true gardening shortcut. A single healthy parent plant can produce multiple new plants with almost no cost, and you don’t need synthetic rooting hormones to succeed. With proper timing, clean cuts, and a few gentle homemade helpers, root cuttings can heal, wake up, and push out fresh growth surprisingly well.
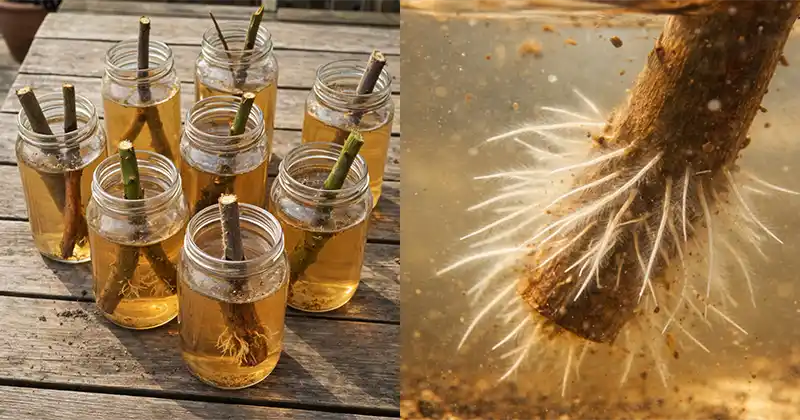
This guide walks you through how to take root cuttings correctly, how to plant them, and how to use simple homemade rooting aids made from everyday materials.
What Are Root Cuttings (and When Do They Work Best)?
A root cutting is a small section of root taken from a parent plant and replanted so it can grow into a new plant. This method works best for species that naturally send up shoots from their roots or store energy underground.
Root cuttings are most successful when:

The parent plant is healthy and well established. Cuttings are taken during dormancy or slow growth, usually from late fall through early spring. The roots are kept moist but never soggy, and extra care is taken to prevent rot or fungal issues while the cutting is vulnerable.
Why Use Natural, Homemade Rooting Helpers?
Homemade rooting helpers won’t replace good technique, but they can gently support the process.
Natural options can help by:
Reducing the risk of infection at the cut surface, supporting callus formation, and creating a mild, forgiving environment for early growth. They are also inexpensive, easy to find, and difficult to overuse.
Think of them as a bonus. Real success comes from clean cuts, correct orientation, airy soil, steady moisture, and patience.
Step 1: Taking Root Cuttings the Right Way
1. Choose the Right Roots
Select roots that are firm, pale or tan in color, and healthy looking. They should be roughly pencil-thick, depending on the plant, and completely free of mushy spots, black rot, or sour smells.
2. Make Clean, Intentional Cuts
Use clean, sharp scissors or a knife. Most plants respond well to root pieces that are 5 to 10 cm (2 to 4 inches) long. Thicker roots can be slightly longer.
3. Mark the Top End
Planting upside down is one of the most common mistakes. To avoid this, make the top end a straight cut and the bottom end a slanted cut. This simple trick makes orientation obvious later.
4. Prevent Drying
Root pieces dry out quickly. Place them in a damp paper towel inside a bag or in slightly moist coco coir or peat while you prepare your pots. Keep them cool and shaded.
Step 2: Use the Right Soil Mix
Soil choice matters more than any rooting hormone. Root cuttings dislike heavy, waterlogged mixes.
An effective rooting mix includes:
Equal parts coco coir or peat and perlite or coarse sand. This balance holds gentle moisture while allowing oxygen to reach the roots.
Step 3: Planting Root Cuttings Correctly
Option A: Vertical Planting
Insert the cutting so the top end sits just below the soil surface, covered by about 1 cm (½ inch) of mix. This method is ideal for beginners.
Option B: Horizontal Planting
Lay thinner roots flat and cover them with 1 to 2 cm (½ to ¾ inch) of soil.
After planting, water lightly to settle the mix. The soil should feel like a wrung-out sponge, never muddy or dripping.
Four Simple Homemade Rooting Helpers
Choose one of these methods. Using multiple helpers at once can do more harm than good.
Aloe Gel Coating
Aloe gel helps keep cut surfaces from drying out while offering mild protection.
Apply a thin layer of fresh aloe gel to the cut end and plant immediately. This option is clean, gentle, and beginner-friendly.
Honey Water Dip
Honey creates an environment that discourages microbes on fresh cuts.
Mix one teaspoon of honey into one cup of lukewarm water. Dip the cut end for 5 to 10 seconds, let excess drip off, and plant. Avoid thick or sticky coatings.
Comfrey Tea
Comfrey is best used as a light soil mist or occasional watering, not a soak.
Steep a small handful of fresh or dried comfrey leaves in hot water, strain once cool, and dilute until it resembles weak tea. Apply sparingly. Discard if it smells sour.
Apple Cider Vinegar Micro-Dip
This method requires care. Vinegar must be extremely diluted.
Mix one teaspoon of apple cider vinegar into one liter of water. Dip the cut end for only 1 to 2 seconds and plant immediately. Never increase the concentration.
Care After Planting: The Quiet Phase
Root cuttings often remain inactive for weeks before showing growth.
Ideal conditions include:
Bright, indirect light, mild warmth between 18 and 24°C (65–75°F), and evenly moist soil that is never waterlogged.
If indoor air is very dry, you can loosely tent the pot with plastic. Keep it ventilated and open it daily to prevent mold.
How Long It Takes and Signs of Success
Some cuttings sprout within weeks, while others take longer.
Positive signs include:
Firm roots, no foul odors, lightly moist soil, and eventually new shoots or gentle resistance when tugged lightly.
Common problems:
Mushy or black roots usually indicate excess moisture or poor airflow. Shriveled roots suggest dryness or too much heat. Surface mold points to stagnant air. Adjust moisture, soil texture, and ventilation as needed.
Final Notes
Root cuttings are a simple, natural way to multiply plants. Focus on the fundamentals: healthy roots, correct orientation, airy soil, and steady moisture. Homemade helpers like aloe gel, honey water, comfrey tea, or diluted vinegar can support the process, but they are optional.
With patience and care, one plant can become many.
