
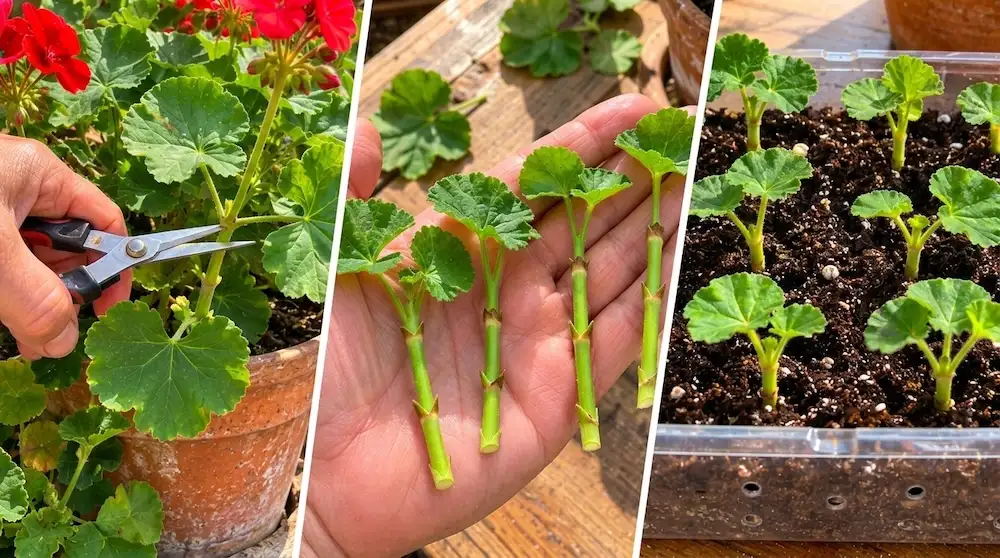
Every autumn, the same scene unfolds on balconies and verandas: geraniums that have bloomed throughout the summer begin to show signs of fatigue, the nights grow cooler, and then one morning, frost blackens their leaves. Many gardeners purchase new plants in the spring without realizing that it is possible to multiply their old geraniums for free.
Geraniums, or more accurately pelargoniums as they are properly called, are among the easiest plants to propagate. A single healthy plant can provide ten, twenty, or even many more new shoots, and this entire process will not take you more than an hour. The secret lies in when you take action: before the first frosts, while the stems are still robust and vigorous.
When should you take cuttings?
The ideal time is in early to mid-autumn, provided the plant is still healthy and the nighttime temperatures do not drop below freezing. Pelargoniums absolutely cannot tolerate frost, which can quickly damage their stems and leaves. If a cold night is forecast, it’s best to act without delay.
Choose a dry day to take your cuttings, preferably in the morning when the plant is well hydrated. The stems should be firm and green, neither soft, woody, nor dried out.
Necessary Materials
- A healthy mother plant
- Sharp, clean scissors or a small knife
- Small pots or a shallow plastic tray with drainage holes
- A light, well-draining potting mix, ideally mixed with perlite or sand
- Rooting hormone powder (optional)
- A bright windowsill
- A watering can with a gentle spray
Step 1: Choosing the Right Stems
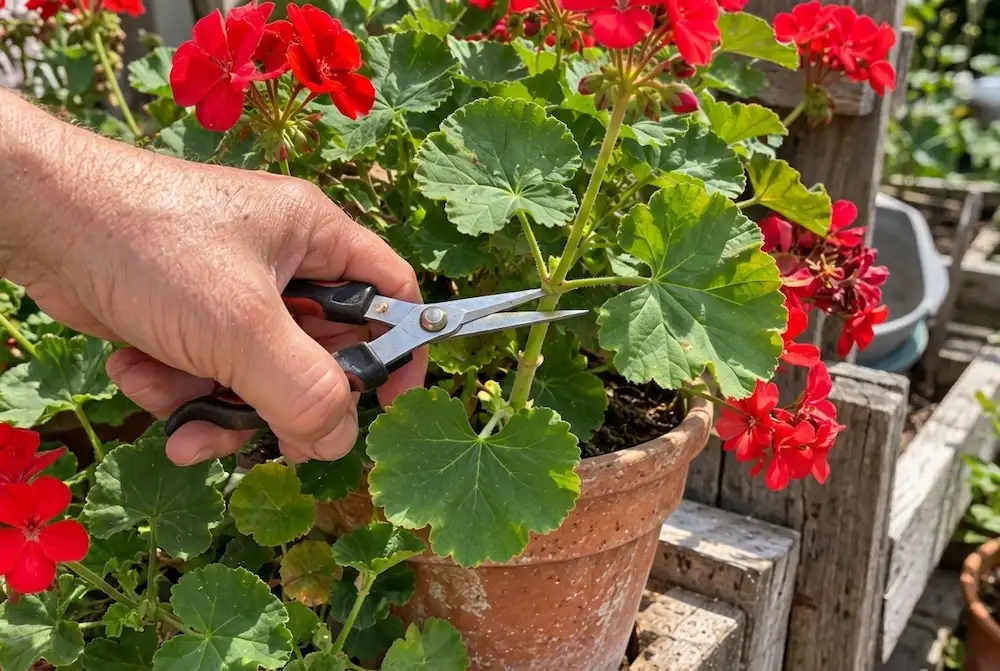
Look for strong, healthy shoots on the plant, without flowers, spots, or signs of disease. Stems about the diameter of a pencil are the best choice. Avoid shoots that are too thin, weak, or dried out.
Harvest your cuttings just below a node, which is the small swelling where a leaf attaches to the stem. This is where the roots develop best. Make a slanting cut with a sharp tool: a clean cut heals faster and promotes rooting.
Take your cuttings from various parts of the plant without removing them all from one side. A well-maintained plant can handle several cuttings, which will also encourage bushier growth.
Step 2: Preparing the Cuttings
Each cutting should be about 8 to 10 centimeters long, with two or three nodes. Remove the lower leaves as well as the stipules (small leaves at the base) to keep only two or three leaves at the top. If these leaves are large, cut them in half to reduce evaporation.
Also remove any flowers or buds that could unnecessarily consume energy. The cutting needs to focus its resources on root formation.
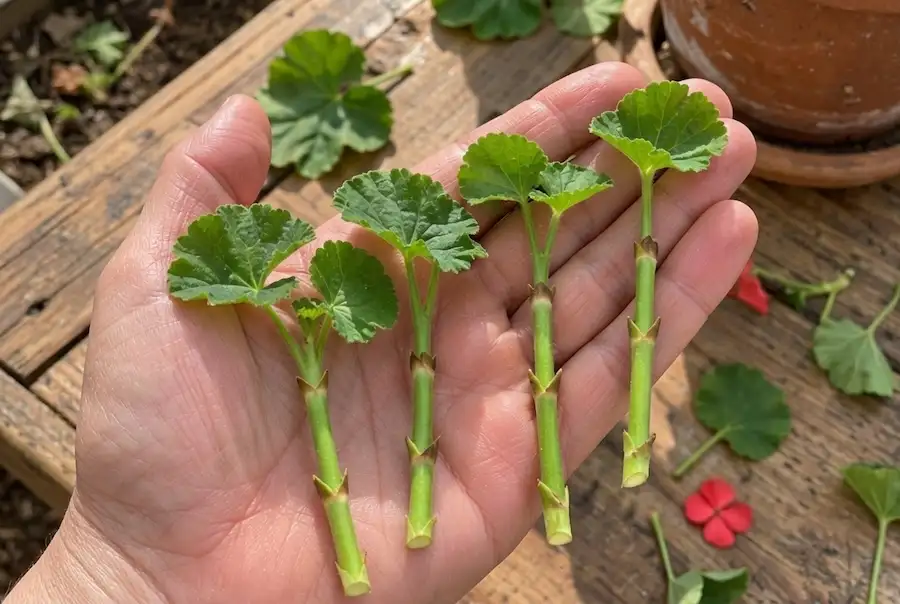
Next comes a step often neglected by beginners: let the cuttings rest for a few hours or even a full day on absorbent paper in a bright, airy spot until the cut appears slightly dry and sealed. Pelargonium stems are very juicy and can easily rot; this short pause helps protect against disease.
Step 3: Planting the Cuttings
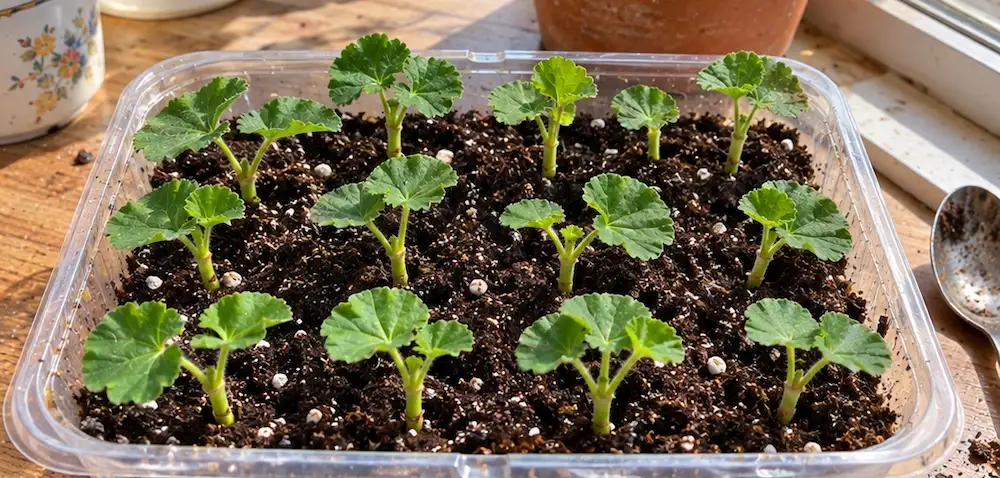
Fill your pots or tray with a light, airy mixture, then moisten it evenly without saturating it. Make a small hole with a pencil, optionally dip the base of the cutting in rooting hormone, then insert it into the soil about 3 to 4 centimeters deep.
Gently firm the soil around the stem to keep it upright. You can place several cuttings side by side in the same tray, making sure the leaves do not touch each other. Good air circulation will prevent mold from developing.
Make sure the container has drainage holes: standing water can cause all your cuttings to rot.
Step 4: Provide Proper Light and Care
Place the tray in a bright location, but protected from direct sunlight which could burn the leaves before the roots have properly formed. A filtered windowsill or a bright room works perfectly. Maintain an ambient temperature around 18 to 22 °C (64 to 72 °F).
Water lightly when the soil surface feels dry. The soil should remain just moist, never soggy. Unlike many other cuttings, avoid covering your geraniums with a plastic bag or airtight lid, as trapped humidity encourages rot and fungal diseases.
Roots generally appear within three to six weeks. You will know your cuttings have taken root when fresh new leaves emerge, or when gently tugging on a stem you feel resistance.
Step 5: Repotting the Plants
Once the roots are established and the plants are growing steadily, transplant each cutting into an individual small pot filled with standard potting soil. Handle them gently: their roots remain fragile.
Keep them in a bright but cool room throughout the winter, ideally at around 10 to 15 °C (50 to 59 °F). Water moderately, allowing the soil to dry out between waterings. Do not fertilize until the days begin to lengthen toward the end of winter. In spring, once the risk of frost has passed, gradually acclimate them to the outdoors over one or two weeks before permanently placing them in pots or on the balcony.
What to do with the Mother Plant?
If you want to keep the original plant, prune it by about one-third, inspect for any possible pests, then bring it indoors before the first frosts. Place it in a bright, cool spot while reducing watering throughout winter. It is normal for the plant to lose some leaves during this resting period. In spring, it will regrow vigorously.
Common Pitfalls to Avoid
Planting cuttings while still wet. Let them dry for a few hours before planting to prevent rotting.
Covering with plastic. Geranium cuttings need air, not excessive humidity.
Overwatering. This is the primary cause of cutting failure.
Leaving flowers on the cuttings. Buds and flowers divert the energy needed for rooting.
Waiting too long. After frost, stems are damaged and root much less easily.
Using heavy, compact soil. It retains too much moisture around the base of the cutting.
A summer filled with blooms does not have to end up in the compost bin. A few minutes with a pair of scissors and a pot filled with light soil are enough to carry your favorite plants through winter and enjoy them again in spring, while producing enough young plants to fill your balcony or share with others. Don’t wait—do it this week before the frost decides for you.
