
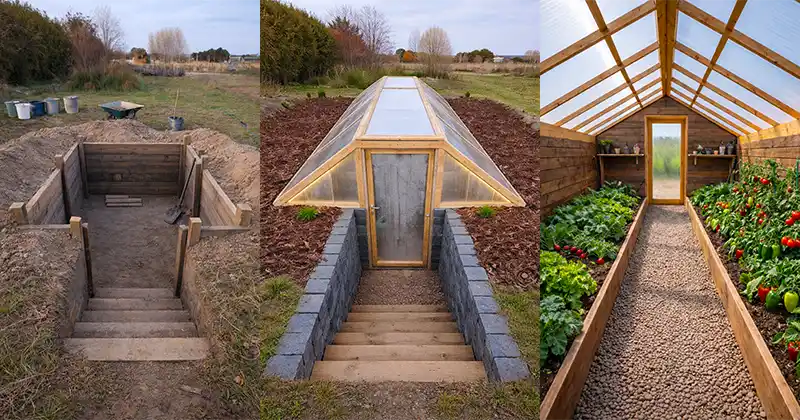
Underground Greenhouses (Walipini): A Smarter Way to Grow Food Year-Round
An underground greenhouse, commonly known as a walipini—a word from the Aymara language meaning “place of warmth”—is one of the most efficient and resilient ways to grow food throughout the year. Instead of battling freezing winters, harsh winds, or sudden temperature swings, a walipini works with the natural stability of the earth.
By building below ground level, this design harnesses steady soil temperatures, minimizes heat loss, and offers natural protection from extreme weather. The result is a growing environment that stays productive when traditional gardens and even standard greenhouses fail.
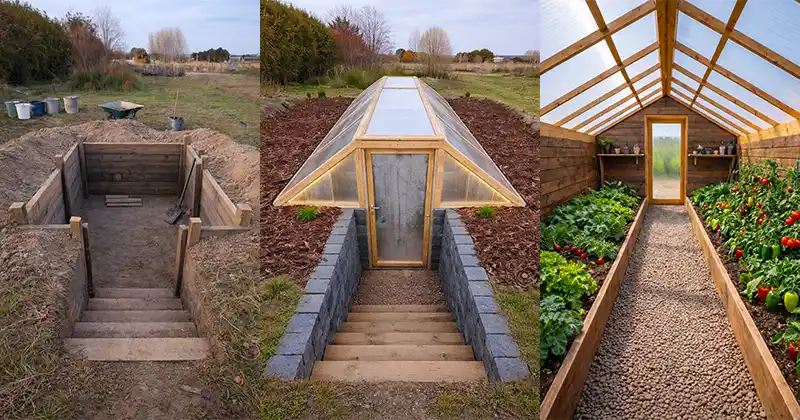
Used for decades in cold and high-altitude regions, walipinis are now gaining global popularity among gardeners, homesteaders, and sustainability enthusiasts. In this guide, you’ll discover why underground greenhouses are so effective and how to build one using practical, proven principles.
Why Build an Underground Greenhouse?
Stable Temperatures All Year
Below roughly 1.5 to 2 meters, soil temperatures remain relatively constant year-round. While outdoor air may freeze in winter or overheat in summer, the earth provides a naturally balanced environment for plants.

Minimal Heating Costs
Unlike conventional greenhouses that rely on heaters, a walipini uses the surrounding soil as thermal mass. Heat absorbed during the day is slowly released at night, often eliminating the need for supplemental heating.
Protection from Harsh Weather
Being mostly underground shields the structure from wind, hail, heavy snow, and storms. This reduces damage and significantly extends the greenhouse’s lifespan.
Extended Growing Season
In many climates, crops can be grown for ten to twelve months of the year, even when outdoor gardening is impossible.
Improved Water Efficiency
Reduced wind exposure and stable temperatures lower evaporation rates, meaning plants need less frequent watering.
Sustainable and Eco-Friendly
Walipinis rely on passive solar energy instead of fossil fuels, making them one of the most environmentally responsible greenhouse designs available.
Greater Food Security
Year-round production reduces dependence on seasonal harvests and external food supply chains.
How a Walipini Works
A walipini functions by combining three natural principles. First, thermal mass allows soil and stone to absorb and store heat. Second, solar gain lets sunlight enter through a transparent roof. Third, underground insulation prevents rapid heat loss.
During the day, sunlight warms the interior and surrounding earth. At night, the stored heat is gradually released, keeping plants protected from freezing temperatures.
Choosing the Right Location
Selecting the correct site is critical for success. The ideal location offers good drainage, a low water table, easy access to water, and open sun exposure. In the Northern Hemisphere, a south-facing slope or unobstructed southern exposure works best. Avoid areas near large trees or flood-prone ground.
Basic Design Principles
Depth
Most walipinis are dug between 1.8 and 2.5 meters deep. This depth allows the structure to fully benefit from stable underground temperatures.
Orientation
The roof should face the sun. In the Northern Hemisphere, this means a south-facing roof, while in the Southern Hemisphere it should face north.
Roof Angle
A roof angle between 30 and 45 degrees maximizes winter sunlight while allowing rain and snow to shed easily.
Shape
A long rectangular layout is the simplest to build and the easiest to manage for planting and maintenance.
Materials You Will Need
Common materials include excavation tools, gravel, drainage pipe, framing materials such as wood or metal, wall materials like concrete blocks or earthbags, transparent roofing material, ventilation components, and thermal mass such as stones or water-filled barrels.
How to Build a Walipini Step by Step
Step 1: Dig the Pit
Excavate a rectangular pit roughly 6 to 8 feet deep, 10 to 30 feet long, and 8 to 12 feet wide. The north wall should be higher than the south wall to support the angled roof.
Step 2: Install Drainage
Cover the bottom with gravel and install a perforated drainage pipe that leads outside the structure. This prevents standing water and root rot.
Step 3: Build Strong Walls
Construct walls using concrete blocks, stone, earthbags, or well-protected treated wood. Walls must withstand soil pressure and resist moisture.
Step 4: Add Thermal Mass
Place stones, bricks, or dark-colored water barrels along the walls to store heat during the day and release it at night.
Step 5: Install the Roof
Build a sturdy frame and cover it with greenhouse plastic or polycarbonate panels. Seal all gaps carefully to prevent heat loss.
Step 6: Ventilation
Include at least one low air intake and one high exhaust vent. Proper airflow prevents overheating, mold, and excess humidity.
Step 7: Create Growing Beds
Raised beds or in-ground beds both work well. Enrich the soil with compost and organic matter before planting.
Best Crops for a Walipini
Leafy greens, herbs, tomatoes, peppers, cucumbers, green onions, strawberries, microgreens, and many root crops thrive in the stable conditions of an underground greenhouse.
Common Mistakes to Avoid
Frequent errors include building in flood-prone areas, skipping proper drainage, using weak wall construction, poor ventilation, incorrect roof angles, and placing untreated wood underground.
Maintenance Tips
Check humidity regularly, keep the roof clean for maximum sunlight, rotate crops, inspect structural supports annually, and add compost as needed.
Cost Considerations
A basic walipini can be built affordably using local materials and manual labor. More advanced designs with concrete walls and polycarbonate roofing cost more upfront but can last for decades. Over time, energy savings make walipinis far cheaper than heated greenhouses.
Is a Walipini Worth It?
For anyone focused on sustainability, food independence, and long-term resilience, the answer is a clear yes. A walipini is more than a greenhouse—it is a durable, low-energy system that delivers reliable harvests year after year.
Final Thoughts
Building a walipini requires careful planning and physical effort, but the rewards are long-lasting. With stable temperatures, reduced energy needs, and dependable food production, an underground greenhouse is one of the most powerful tools for modern sustainable gardening.
